Friday, September 09, 2016

Rosette card

 It's been a while since I posted last as I have been battling my migraines again. Unfortunately the worst thing for me to do while I am in a migraine phase is look at a back lit screen like a laptop or tablet. Now though I am on the mend and able to post again!

   So today I am going to show you how I made this really fun card using the Craftwork Cards Bohemian Dreams kit for The Fruit Pixie who I design for.


These rosettes are very easy to make and you can make them any size you like. The only thing you need to keep in mind is the larger the rosette the wider and longer the strip of paper needed but you can easily stick 2 strips together to get the length you need. I would do that after you have scored and folded them.

OK, to make your rosette you will need a strip of paper, a score board ( you could use a ruler to measure and then fold but it dose take a bit of patience to do that but it can be done ) and some wet glue.


First cut your strip of paper, this one is about 1 inch wide, place on your score board, I am using a Hougie Board on the cm side.


Score down each mark and then fold up as shown. Now if I wanted a larger rosette I would use a wider strip of paper and score and fold a second or even third strip and then stick them together.


Glue your folded strip into a circle using a wet glue as shown. I do mine so the pattern you want for the front is on the outside of the circle, you will see why in the next step. Then cut 2 circles of card or paper. These circles are the top and bottom of your rosette and give you a base to glue the rosette too. I have the larger one on the bottom and the small one on the top. You can use any scrap card for the bottom as it won't be seen but the top one needs to be from a coordinating paper or card as it will be seen.


Take your larger circle and put a generous amount of wet glue onto it and put it to the side but within reach. Then the bit that some people find a little tricky, take your rosette and using your fingers push gently out and down on the top of the circle. Your rosette will then fold down flat. While keeping your fingers on the flattened rosette bring your glue covered circle in and place glue side down onto the middle of your flattened rosette. If you let go it will spring back up again, if that happens just do the same as you did before to flatten it again. That is why you have the back on the inside of your circle. If you change your mind or forget that bit you can turn them over carefully but they can sometimes fight back!!
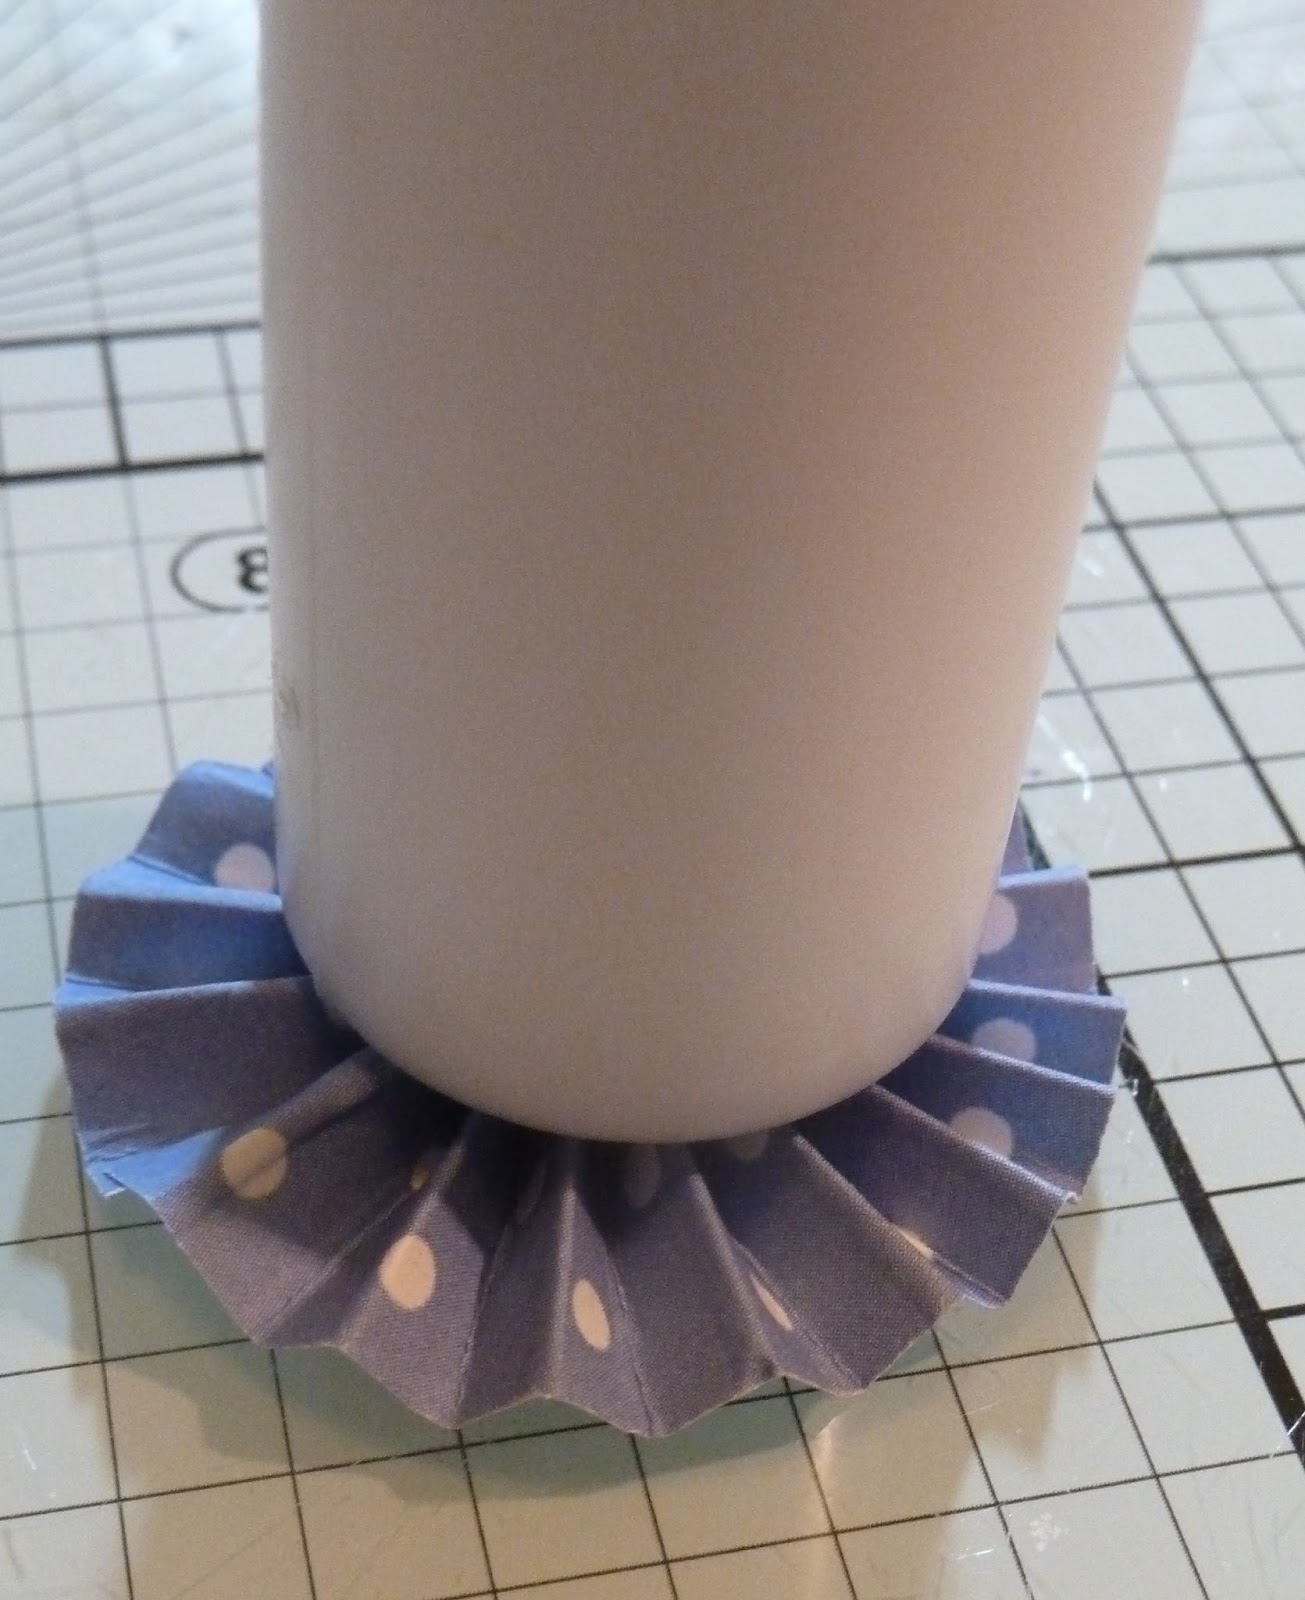

I then put something on top of the rosette immediately to hold the base in place for it to dry.


Once it has dried you can turn your rosette over and glue the other circle onto the top. I still put a small circle onto my rosette even if I am going to add a button or other decoration as it helps stabilise the finished rosette.

So that's how you make your rosettes, all I did to make up my card is make several rosettes in different sizes using the different papers in the pad, of course the are all double sided which gives you so many choices!


I used a couple of the papers as a background and then layered up the rosettes and added some buttons.


To finish off I also added some of the Candi that comes in the kit using tiny foam pads and one of the sentiments from another of the papers.

I was really pleased with this card, so bright and summery!

You can find the Craftwork cards Bohemian Dreams paper kit in The Fruit Pixie shop here - 
 http://www.thefruitpixie.co.uk/craftwork-cards-8-x-8-collection-pack-bohemian-dreams-25673-p.asp

A wonderful selection of buttons here - 
http://www.thefruitpixie.co.uk/buttons-34-c.asp

3D foam that fit the Candi here - 
http://www.thefruitpixie.co.uk/stix-2-3d-foam-pads-black-2045-p.asp


Friday, August 26, 2016

New Beginnings digital pages

I have been designing for Krysty Scrap Designs for a while now but the owner and designer has taken a break for a time. Now though she is back designing digital kits again and her new kit New Beginnings is out on Monday

  I have made 2 digital pages for her using this kit -


 You can buy the kit through Mischief Circus here                             - https://www.mischiefcircus.com/shop/product.php?productid=23873


Friday, August 12, 2016

Craftwork cards quick cards

 I have been using the beautifully summery Craftwork cards Bohemian dreams paper kit for The Fruit Pixie. I really, really love this kit. Its right up my street.

    What I love about Craftwork cards and I have been using their products for many years now, is they give you plenty of each paper design so you can cut them up without feeling that you are wasting a design.

 So this is what I have done with these cards, they were very quick and easy to make but I think look modern and fresh.

 For the first 2 cards all I have used is the papers. So if you have never made a card before you could easy make these cards and I promise you will be up and running.


For this card I cut a square of the wheelbarrow paper around the pattern on the paper and then just cut out some butterfly's from another of the papers in the pad. The sentiment was also from one of the papers. All you need to make this card and in fact all of the cards in this post, is this paper pack and a pack of cards and envelopes. I will add all the links below.

For card 2 - 


Again a super easy card, just using the papers from the pack. I cut the typewriter out from one sheet and then used some of the other paper designs ( remember they are all double sided so have a different pattern on the reverse ) to cover the bottom part of the card to "ground" your main image. I then punched some little hearts out of the red paper using one of my heart paper punches and added one of the sentiments from the papers which is full of little sentiments. So there you have it, another card just using the papers.

Card 3 - 


As well as the wonderful papers in this kit you also get some lovely pre-cut toppers. I have used one of them for this card. Again very simple, I started by rounding off the corners of my card, you can buy a punch to do that for you but you can also just round them with scissors. I then cut a square of the paper and also rounded the corners there. I cut the red scalloped circle from one of the red papers using one of my dies and added one of the borders, again cut from one of the papers. Again a nice card made just using the card kit and a card blank.

As well as the papers, all double sided and the toppers in this kit, you also get pretty butterflys and bunting, all cut out for you and of course the Craftworkcards famous Candi!

You can find this lovely kit in The Fruit Pixie shop here - 
http://www.thefruitpixie.co.uk/craftwork-cards-8-x-8-collection-pack-bohemian-dreams-25673-p.asp

The card packs here - 
http://www.thefruitpixie.co.uk/card-blanks-374-c.asp

A set of the scalloped circle dies here - 
http://www.thefruitpixie.co.uk/spellbinders-die-petite-scalloped-circles-large-25815-p.asp


I hoped you like my quick cards using this lovely kit from Craftworkcard and will give card making a try if you have never tried before. I promise you can get this great results with this quality kit.

If you have any questions just ask below and I will be happy to help. 


Friday, July 29, 2016

Chemistry cards

  Now, I have lots of mens cards to make for our family, my sister has two teenage boys and as their birthdays come around I find myself searching for something I can use that they will like. The youngest, Luke had his birthday yesterday and as he is doing his A levels which include sciences, I thought these stamps and stencils from IndigoBlu from The Fruit Pixie would be perfect.

  I ended up making 3 different cards, all using everyday card blanks. I decided to use my Gelli plate to make the backgrounds using acrylic paint.

 For my first card ( and the card I ended up giving to Luke ) I used the IndigoBlu wierd science stencil for the boarders along the top and bottom. Then the IndigoBlu periodic table stamp to make the background.


The Albert Einstein quote came from the IndigoBlu Chemistry Lab stamp set which I stamped and then cut apart for the card.


The test tubes are also from the Cheistry Lab set which I have stamped onto card I have painted using my Gelli plate and cut out .


For the second card I used a DL card blank but have used it landscape instead of portrate. Again the base colour was applied with my Geilli plate.


I used the Wierd Science stencil to add the dotty border.


The stamp for the background was from the Chemistry Lab set.


I used the Periodic table stamp again stamped onto Gelli platted card. the little flasks were also stamped onto painted cardstock and cut out.


The final card, another 6x4 card blank painted using my Gelli plate.


I stamped the Periodic table onto the card.


Stamped the flasks onto 2 different painted card and cut them out compleatly from 1 of the card colours but only cut the liquid in the flasks out of the other so you could layer them to look like the flasks have liquid inasde


I then stamped the second quote from the Chemistry Lab stamp set, cut it apart and applied to the card to finish.

These stamps and stencils from IndigoBlu are so different, I really like them and think they are perfect for thoses sciency people in your lives.

You can find the stencil in The Fruit Pixie online shop here - 

http://www.thefruitpixie.co.uk/indigo-blu-stencil-weird-science-26201-p.asp

The stamps I used here - 

http://www.thefruitpixie.co.uk/indigoblu-rubber-stamp-plate-chemistry-lab-26171-p.asp

Card blanks here - 

http://www.thefruitpixie.co.uk/card-blanks-374-c.asp


Seaside Zine

As part of my design team duties for the Tangie Baxter and Co Art Journal Emporium I write a blog post each month. This month Tangie had this wonderful idea, members of the emporium would make and share little Zines with each other. I loved this idea and so wrote my blog post about my Seaside Zine.

  These little books are so easy to make and I had such fun making mine, all cut and paste work. I made the background using my Gelli plate. All the images are from Tangie Baxter and Co

  You can find out exactly how I did it with step by step photos on the Tangie Baxter and Co blog
here - http://shoptangiebaxter.com/blogs/news/oh-i-do-like-to-be-beside-the-seaside-zine-by-katrina-rollings

 Also information about the Art Journal Emporium, which is fantastic value here - http://shoptangiebaxter.com/

  Finally here is my little Zine -


If you like to art journal or would like to get started, I can recommend the Art Journal Emporium, I was a member for many years before I joined the design team and it really is lots of fun.


Friday, July 08, 2016

Tiney fairy book

 I have another little project to show you using the beautiful Graphic 45 Enchanted Forest paper collection and the sweet little Woodware Chippies Tiney books chipboard set I have made for The fruit Pixie online shop.

  Woodware Chippies are blank chipboard shapes you can paint or cover, depending on what you are making. I have used the Tiney books set, well half of the set, to make my little book.


For the base of the book I just covered the book pages, both sides, with some of the Graphic 45 Enchanted Forest background 12x12 paper and cut the ribbon slips. Remember to do this before you cover the reverse side or you will never find them!


I then used the images from the Dazzling Damsel 8x8 background paper to collage my pages.


All of the word strips are from the Gilded grandure 8x8 paper, as well as the cute little stamps on the front cover too. I believe in fairies is a stamp from the Enchanted Forest stamp set 1.


I then used some ribbon to compliment the book to tie it all together. 
TIP- For the ribbon ties, place a pencil on the ribbon before you tie the knot so you have room to turn the pages.


As you can see its a sweet little book and great fun to make.

You can find the Woodware Chippies Tiney books here - 
http://www.thefruitpixie.co.uk/woodware-chipboard-414-c.asp

Graphic 45 Enchanted Forest papers and stamps here - 
http://www.thefruitpixie.co.uk/enchanted-forest-696-c.asp

Ribbons here - 
http://www.thefruitpixie.co.uk/may-arts-ribbon-410-c.asp

I think this would be a great project for the children to make and the summer holidays are just around the corner too!

Sunday, July 03, 2016

Gift money envelope

 Here is my latest project for the Fruit Pixie, who I design for, using the Payper Box Kraft Paper collection.

    These papers are printed on 130g Kraft paper with a beautiful pattern on one side then plain kraft on the other ( so geat for using up all those little scraps we have left over ) They cut and fold well and so are perfect for all our card making and scrapbooking projects.

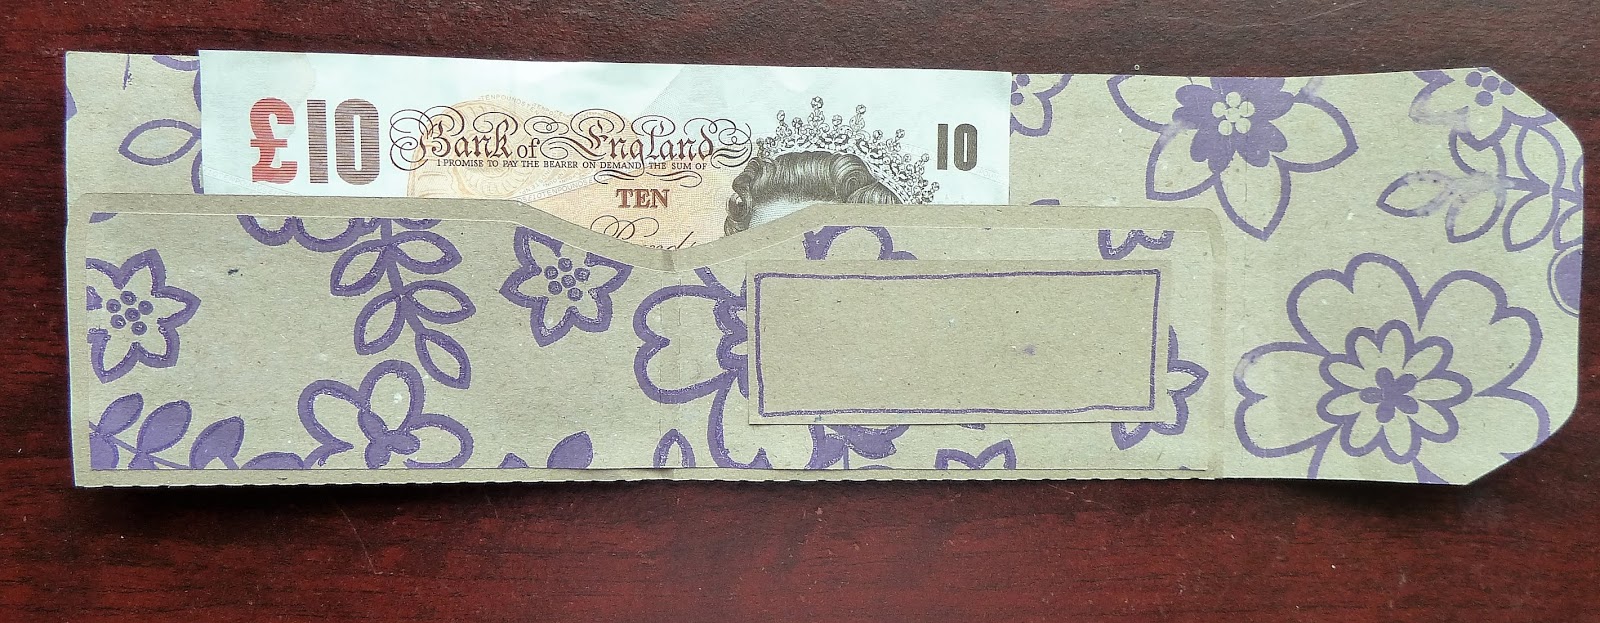
   I have teenage Nephews so I am always looking for ways to give them the money they ask for for birthdays and Christmas in a way that looks like I have put some thought into it. This little money envelope is perfect for any age as the paper you use to make it alters the look. It is cut on my Silhouette Cameo, the paper cut beautifully.


This one I actually made to give to my Mum as part of her birthday gift so to add a little bit of sparkle I used my glitter pen to draw around the design, which worked very well.


You could even use a quicky glue pen and glitter too which would look amazing.


As you can see this paper is very versitile as being kraft on the wrong side both sides can be used.

This range comes in 4 different paterns and 5 different colours. I used the purple daisy for this project.

You can find all the papers in the range in the Fruit  Pixie shop here - 
http://www.thefruitpixie.co.uk/12-payper-box-695-c.asp

the quicky glue pen here -
 http://www.thefruitpixie.co.uk/sakura-quickie-glue-pen-5213-p.asp

glitters here -
http://www.thefruitpixie.co.uk/cosmic-shimmer-polished-silk-glitter-600-c.asp


Friday, June 17, 2016

Paper Box Retro paper gift bag

  I am taking a short break from the Graphic 45 papers to show you the new papers in the Fruit Pixie shop from Paper Box. The first set I have to show you is the Kraft Paper Retro. It's 12x12 and 130gsm so it folds and cuts beautifully. It is printed on one side but because it is printed on Kraft paper you also have the plain Kraft on the other side, so all the off cuts can be used on other projects. I have used the pink but it also comes in brown, yellow, evergreen, leaf green and orange.


I used my Silhouette Cameo electric cutting machine to cut out my gift bag and tag shape and it cut beautifully. Try it in your die cutting machines too.


It has a lovely Art Neuvo inspired pattern on it and as its a fairly simple print it gives you lots of scope to add your glitters or use your glitter pens. I have just coloured in the flower center on the front of my bag with my clear glitter pen.


My tag was cut from the left over paper and then I cut out the flower and applied it to the top. As the paper is the same coloue it just blends in.

I was really happy how these papers held the shape of the bag and as I said before cut beautifully. Do have a look at them, there are other designs in the collection and I will be focusing on the other designs shortly.

You can find the Paper Box Kraft papers in the shop here - 
http://www.thefruitpixie.co.uk/12-payper-box-695-c.asp


Friday, June 10, 2016

Graphic 45 Enchanted Forest Princess matchbox

  At the moment I am working with the Graphic 45 Enchanted Forest papers as a designer for The Fruit Pixie and really enjoying them. For my last post I showed you a super cute Fairy matchbox. Well I couldn't just make one, they are such fun to make and the papers have so many lovely characters to cut out and use I had to make a second one.

   This time I went for the Princesses.


Now, I made my base matchbox using my Silhouette cameo electronic die cutting machine but there are a lot of free templates available on the internet to use. I made my base in kraft card and then covered the cover of the matchbox in one of the pretty papers in the 8x8 paper pad. 

I then cut out one of the panels from one of the papers, I chose a Princess one this time, and stuck it to the top of the base part of the matchbox.


Then I  put the drawer of the matchbox together and covered one end with another of the papers. There are lots of details among the paper designs that are perfect to cut out and use as embellishments, like this roundel.

To make this embellishment I punched out the design using circle punch and then punched a piece of the scrap kraft card to back. I did that because I wanted to use some Glossy Accents over the top and I find when you do that to small pieces they can curl if they are too thin. I used the crackle Glossy Accents but you can get the same look with the regular Glossy Accents. 

If you want the cracked look but haven't got the crackle Glossy Accents then just use the regular one thickly. leave to thoroughly dry and then just bend it and you will find it will snap and crack. I has to be applied thickly though.


For the inside of the drawer I started by covering the sides with pieces of the papers from the pad to make it look like a room in the castle. I then made the bunting with the sweet little flags that cover another one of the papers. I cut them out and glued them to some bakers twine and hung them across the back of the room.

We then needed Princesses to live in our castle, so I chose two of the princesses from the page full of characters and cut them out. The larger of the Princesses I added 3 layers of 3D foam to her back and then stuck her to the back of the drawer. The smaller one I added 2 layers of 3D foam and also stuck her to the back of the box.

All it needed then was to pick out some highlights with my trusty clear glitter pen and my mini scene was finished.


I have had such fun with these two projects.To find the other matchbox I made, just go back a post and you will find it there.

The Graphic 45 Enchanted Forest paper and many other wonderful things, can be found here in the Fruit Pixie shop - 
http://www.thefruitpixie.co.uk/enchanted-forest-696-c.asp

I 

Friday, June 03, 2016

Enchanted Forest fairy matchbox

   I must admit I do love to work on 3D projects, and will save any little container I can paint or cover in any way. My new thing is matchboxes. I love all the little scenes people make in these little boxes, great fun!  So when I saw the lovely little people that cover one of the papers in the 8x8 Enchanted Forest paper pad by Graphic 45 I new what I wanted to do with them...........they were destine to live in a  matchbox!

    I made my matchboxes using my Silhouette Cameo electronic cutting machine but there are lots of free templates available online and as they are all straight lines, simple to cut and make up.

   The first one I want to show you is my I believe in Fairies matchbox


I made my matchbox base in craft card and then used a piece of the black diamond paper to cover all the sides of the matchbox cover leaving a thin margin of the base card to show. I then chose one of the lovely panels from another paper, the I believe in Fairies one, and attached that to the top of the matchbox.  Using a clear glitter pen I traced over some of the highlights to add a little sparkle.


For the end of the matchbox drawer I cut out one of the little roundels from one of the papers and then used one of my own brads.


The inside of the drawer I covered with the red script paper, picking out the Once Upon a time for the back. I then cut out a couple of the fairies from the page full of fairies and princesses. The main fairy I raised up on 3D foam but the small one I stuck flat on the back. The happy ever after is a small piece of the word strips also on one of the papers.

Then all you have left to do is place the drawer inside the cover and your little matchbox is finished


So that is my first matchbox I have to show you, the second one I will show you in my next post. So watch this space!!

You can find the paper in The Fruit Pixie shop here - http://www.thefruitpixie.co.uk/enchanted-forest-696-c.asp


Saturday, May 28, 2016

  I am still spellbound by the Graphic 45 Enchanted Forest papers that you can find in the shop ( link will be at the bottom of the post )  I have been working with Graphic 45 papers ever since they started but one thing I have noticed that is new and such a good idea is the templates they now include on the covers of their 8x8 paper pads.

                     Here they are. Excuse the dark pictures, it was such a dull day, but you get the idea.


As you can see you get all sorts of tags and a wonderful pillow box. These are great because you have the beautifully printed card on the other side and as it is the cover of the paper pad it is perfect for them.

So I thought I would make the pillow box up for you to show you how it looks. Of course the savvy crafter would  make a template from them too!

  All I did was take the cover with the pillow box printed onto it and cut it out along the solid lines. You then need to crease the dotted lines. The easiest way to do this is to find something soft, like an old fashion mouse mat or just a few pieces of scrap paper and then using a bone folder or the end of the handle of a spoon draw along the dotted lines. You can use a ruler to guide your scoring for the straight bit but for the curves you have to do it freehand.

Apply wet glue to the straight flap and stick it to the straight side on the other side, allow to dry. You will then find your flaps at either ends will fold down beautifully to close the box and give it its shape.


Of course you then need to decorate your lovely pillow box now. I chose a panel from the paper pad and cut a couple of swirls, also from the paper pad, using the Sue Wilson splendid swirls.


I also cut out one of the tags and just decorated it with a couple of the cute little stamps that are also in the paper pad.

The Graphic 45 Enchanted Forest is a really beautiful collection and the addition of all these templates just gives you somewhere to start.

You can find the Enchanted Forest Collection papers in The Fruit Pixie online shop here -  http://www.thefruitpixie.co.uk/enchanted-forest-696-c.asp

The Sue Wilson Splendid Swirls dies here - 
 http://www.thefruitpixie.co.uk/sue-wilson-die-splendid-swirls-24678-p.asp

Payper Box bone folder -
 http://www.thefruitpixie.co.uk/payper-box-bone-folder-20088-p.asp


Friday, May 20, 2016

Graphic 45 Enchanted Forest Fairy Tower

     At the moment I am working with the Graphic 45 Enchanted Forest papers for the Fruit Pixie, a wonderful online shop who I design for.
 
     Now, I was playing with these papers at my last crop and a lot of my crafty friends, although they love Graphic 45, said they found then difficult to use because they were too nice and didn't want to spoil them. I have herd many people say this and even felt it myself, but if you keep them in a draw and look at them now and again, where is the real pleasure in that? But if you jump in and make something with them, cut them up and make a beautiful project, you then have had the pleasure of making something and then you can then either use it, looking at it or giving it to someone. Now I think that is far better then having a cupboard full of paper isn't it?

    So with that in mind, here is my first project using these wonderful papers.

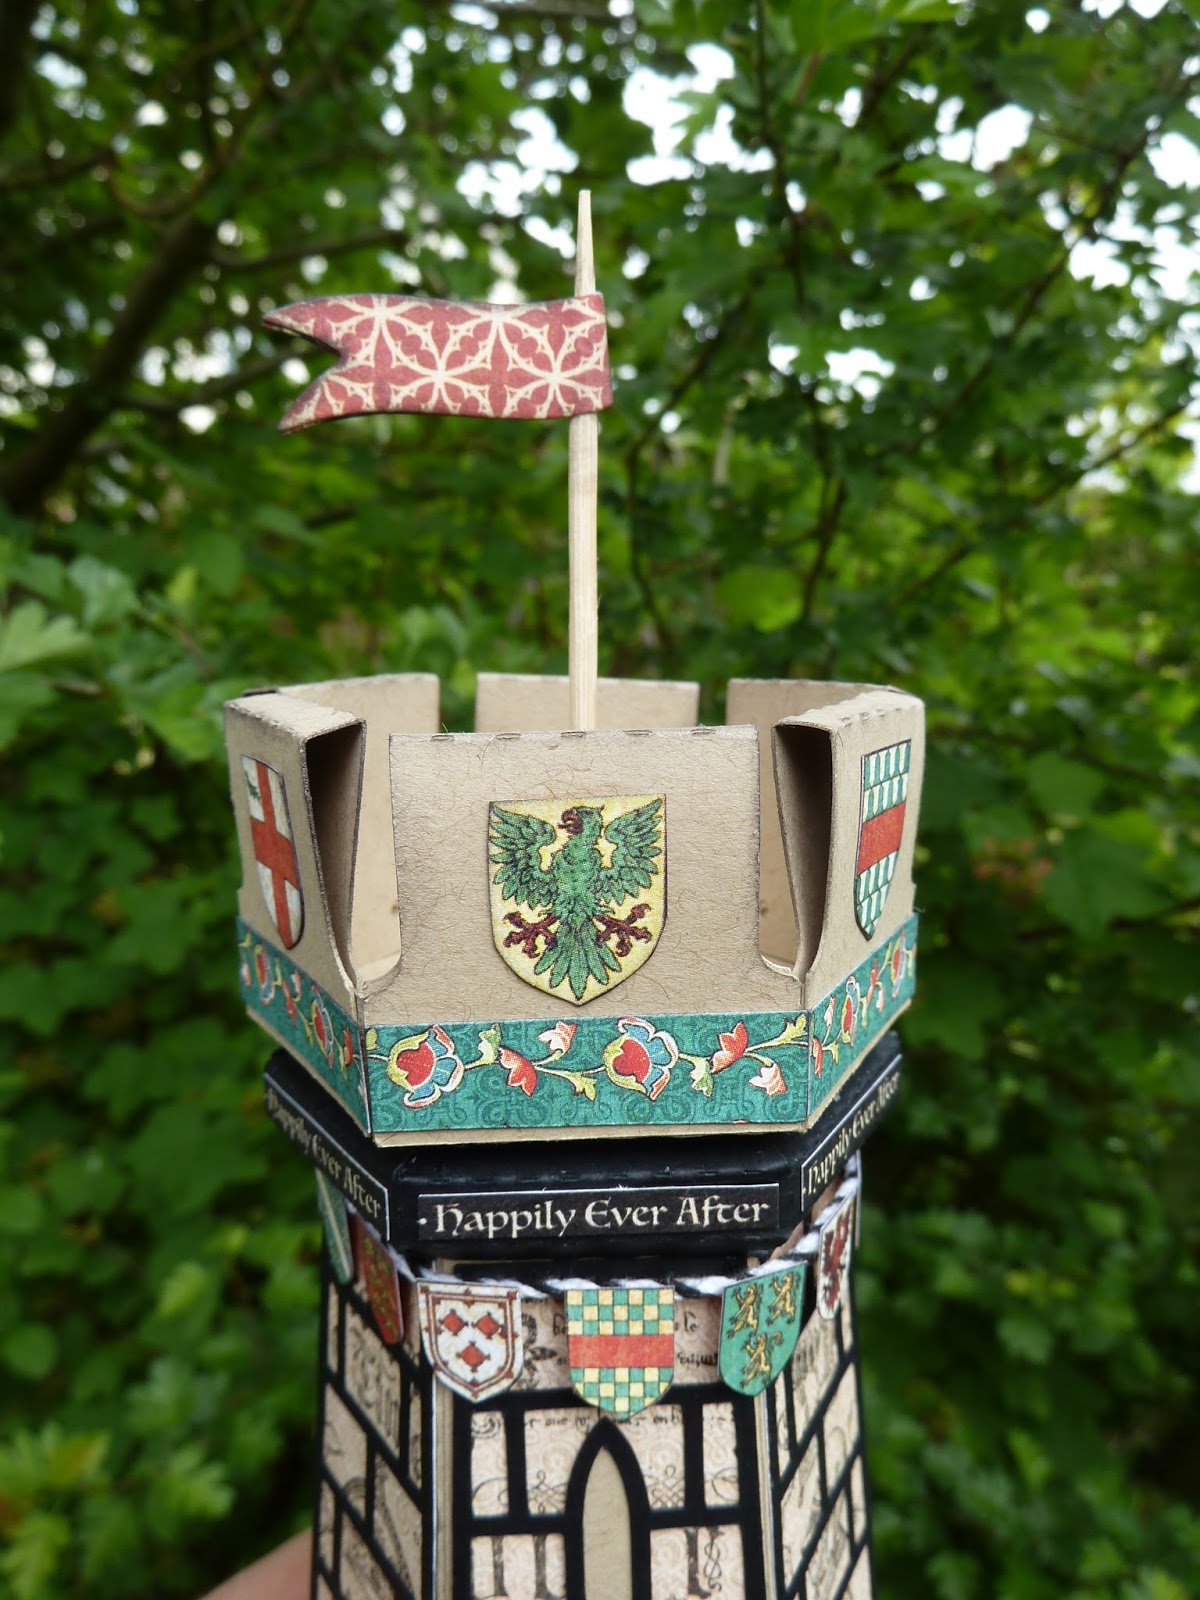
  When I first looked through the 12x12 papers and paper pad the first thing that I wanted to make to make a fairy tower. The closest thing I could find was a chess piece made using my Silhouette Cameo.


I increased the size of the tower slightly and cut the pieces out on my machine in craft card. I then used the different elements in the 8x8 paper pack to decorate my tower.


Of course the tower had to have a flag. So I cut down a bamboo skewer and using a die and my die cutting machine cut out a flag from one of the pattern papers.

One of the papers has rows and rows of these wonderful flags. I cut some of them out and glued them to some bakers twine.

There are plenty of boarders and word strips within the patterned papers to cut out and use to decorate your projects.


For the main body of the tower I used the script paper.


Then the base was also decorated with patterned paper and boarders to finish the tower off.


The project all came together so easily as these papers are just so nice to work with. 

I think my Fairy Tower looks right at home among the primroses in our garden don't you ?


Do give these papers a go, there are endless projects you can make with them. I will be showing you a few over the next few blog posts.

you can find the papers in The Fruit Pixie shop here -

http://www.thefruitpixie.co.uk/enchanted-forest-696-c.asp

the bakers twine here - http://www.thefruitpixie.co.uk/fibres-ribbons--trims-54-c.asp